PaperGuru 博客
所有文章 →Introducing Lab Compute: GPU-Powered Experiments, Right Inside Your Research Workspace
PaperGuru now lets you rent a remote GPU machine and connect it directly to your research session — browse files, open a terminal, and ask the agent to run experiments, all without leaving the editor.
作者 PaperGuru Team · 2026年5月20日

Most research papers require computation. At some point in nearly every project — running ablations, training a small model, reproducing a baseline, processing a dataset — you need a machine with a proper GPU. The usual path involves a cluster queue, an SSH config, or a notebook on a cloud provider that lives entirely outside your research workflow. You copy results back by hand. You lose context. The agent helping you write the paper has no idea what ran or what it produced.
Today, we are shipping Lab Compute in beta — a remote GPU environment that connects directly to your PaperGuru session. You rent a machine, connect it to your workspace, and from that point forward, your file browser, terminal, and AI agent all share the same compute context. No separate window. No manual copy-paste. The loop between running an experiment and writing about it closes entirely.
Lab Compute is the first feature under Guru Lab — PaperGuru's growing suite of capabilities built specifically for research and science. Compute is the foundation, but it is only the beginning. More tools tailored to the full lifecycle of empirical research are on the way.
What You Get
Lab Compute gives you access to dedicated remote machines powered by high-end GPUs. Two configurations are currently available:
Compute XS is built around an RTX 4090 with 24 GB of VRAM, 8 vCPU, and 80 GB of disk. It is the right pick for most inference workloads, medium-scale training runs, and any experiment where a 24 GB card is sufficient headroom.
Compute S steps up to an RTX 5090 with 32 GB of VRAM, 15 vCPU, and 80 GB of disk. Use it when you need maximum single-card throughput — large model fine-tuning, diffusion model work, or anything that bumps against the memory ceiling of a 4090.
Both configurations are available on a prepaid hourly basis. You purchase a block of runtime upfront, connect the machine when you need it, and stop it when you are done — unused time rolls over to your next session. When you need more time, you can renew from within the workspace without interrupting whatever is running.
We are actively working to expand this selection. More advanced hardware — including next-generation chips and multi-GPU configurations — is on the roadmap, and we are working closely with our infrastructure partners to scale supply and meet the growing demand for high-end compute from the research community.
The Lab View
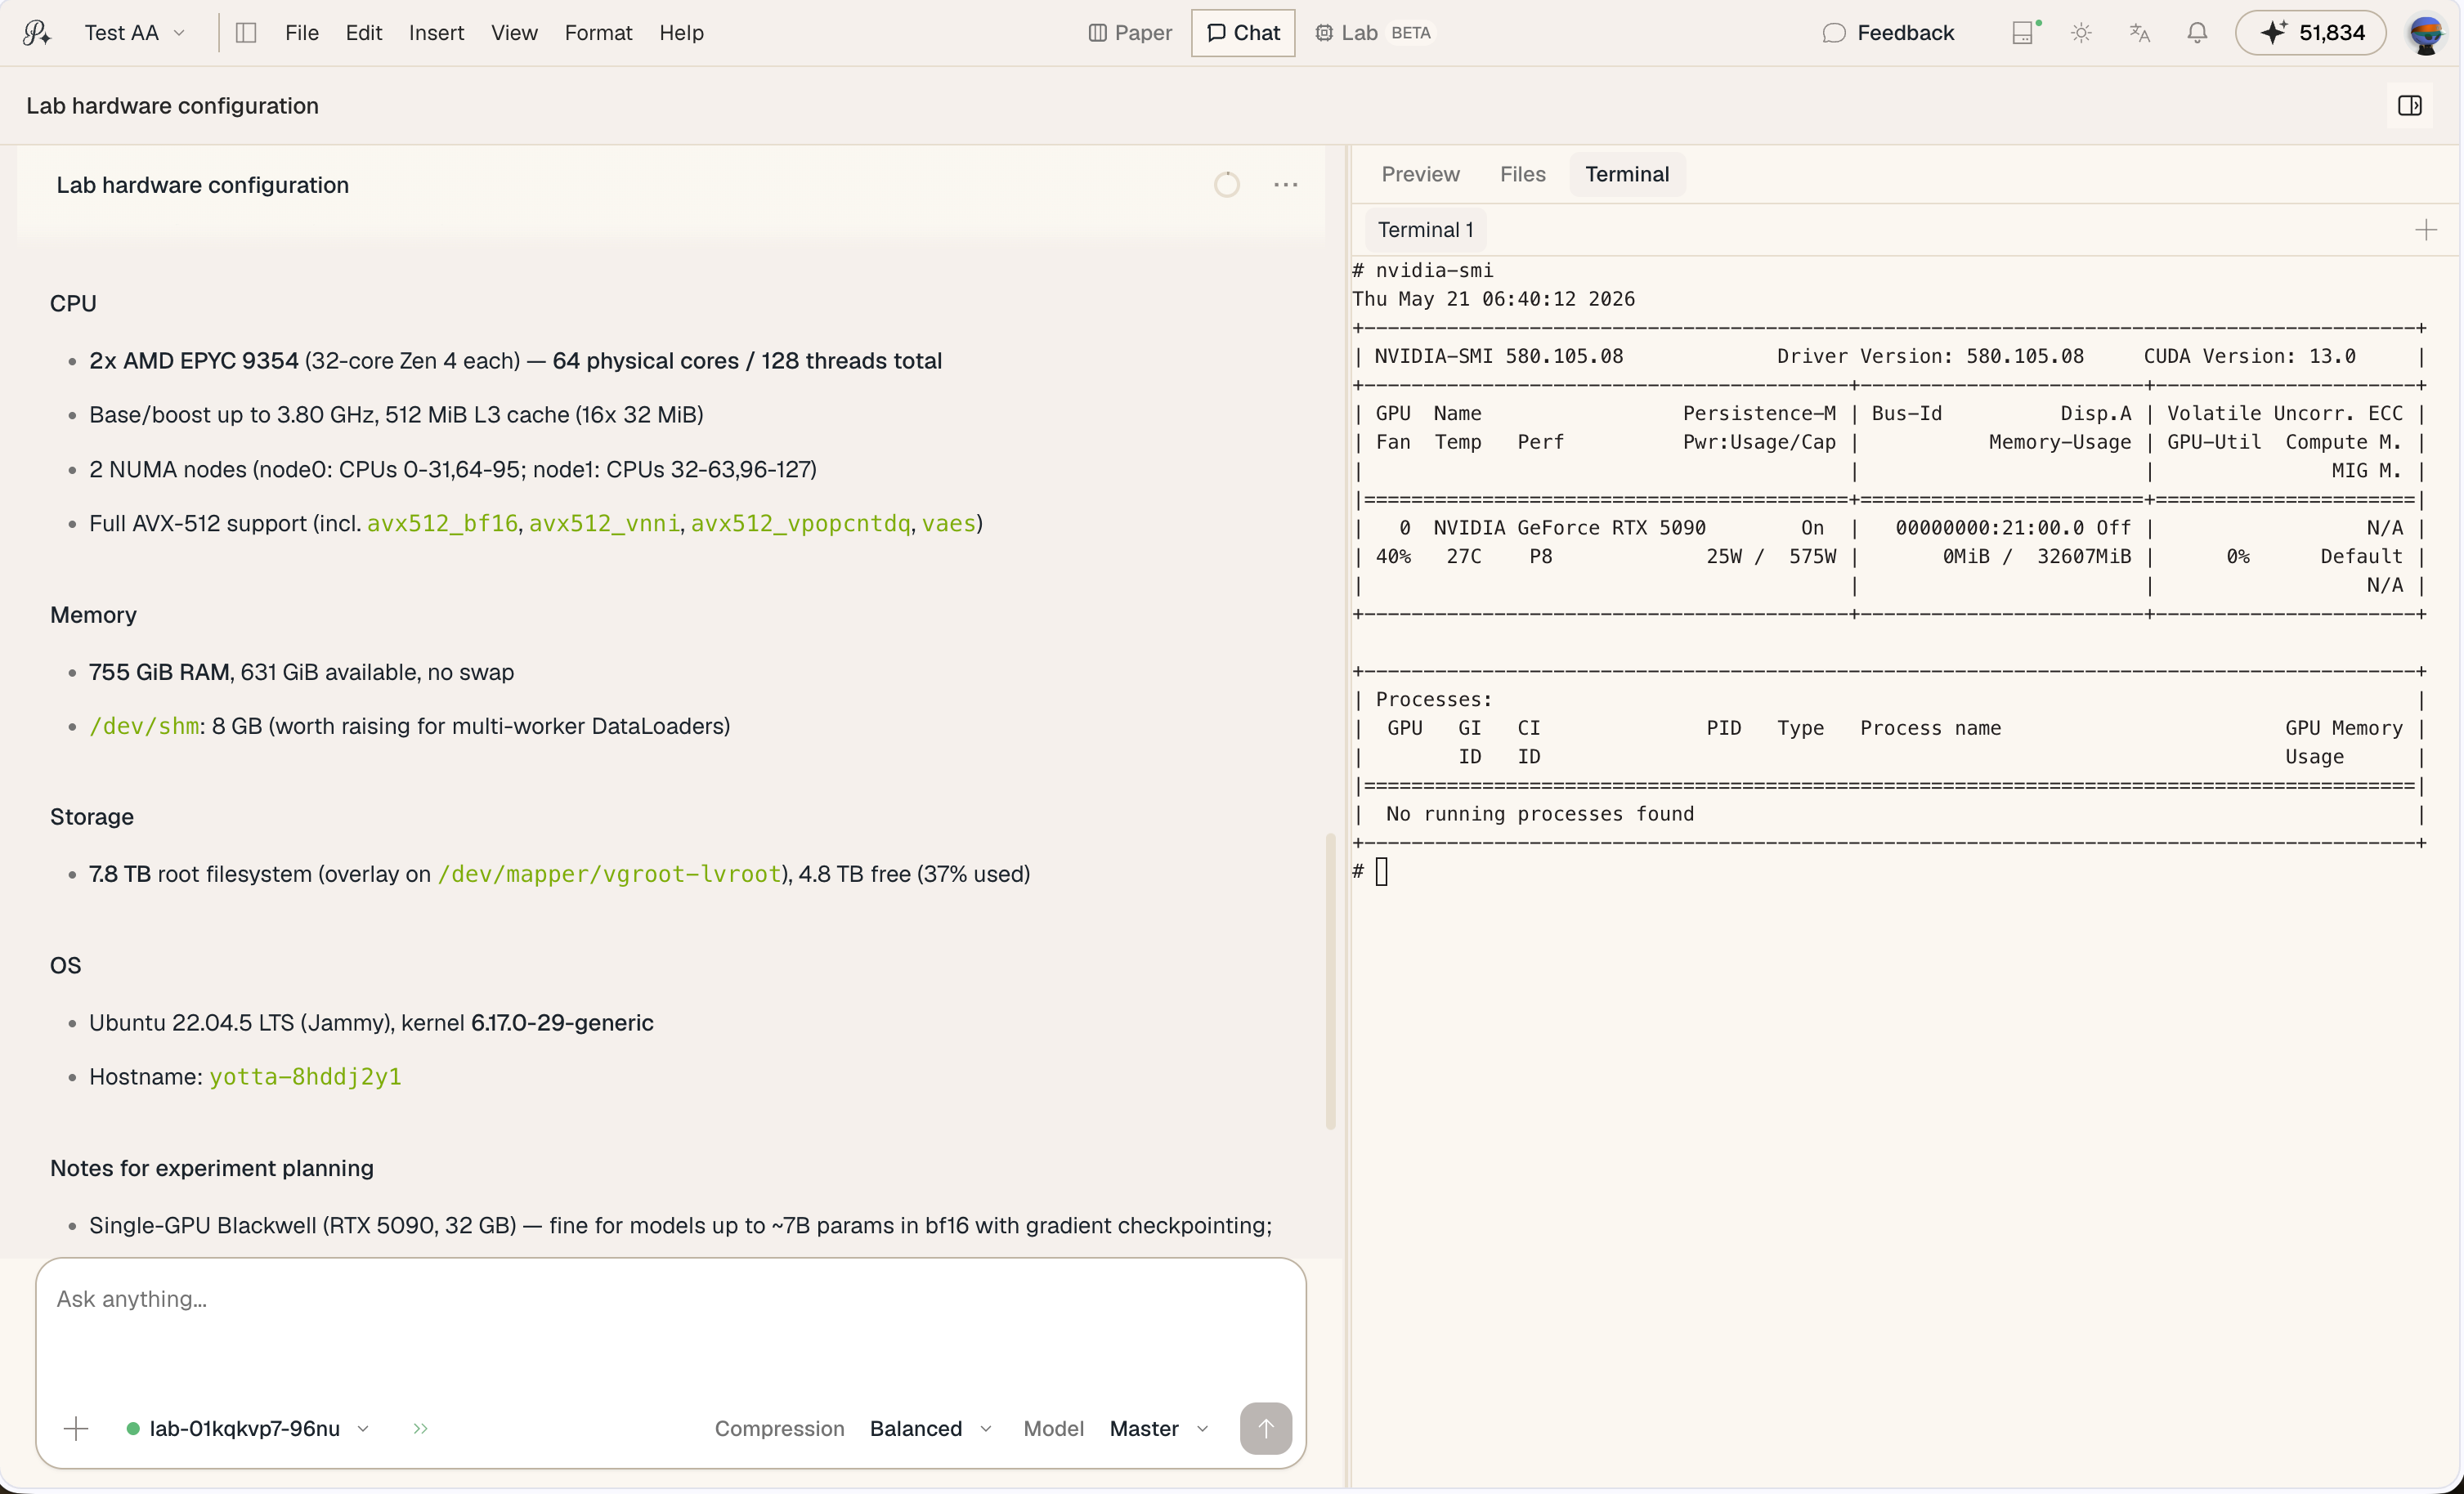
When you connect a Lab Compute instance, a dedicated Lab View opens inside the editor. It has two panels side by side: a file browser on the left and a terminal on the right.
The file browser is a full remote filesystem explorer. You can navigate directories, open files to read or edit them directly, create new files, rename, delete, and upload from your local machine. Binary files are handled automatically. The editor is built into the panel — you do not need to copy content out to view or modify it.
The terminal panel gives you direct shell access. It runs a real PTY session on the remote machine, so anything you would normally do over SSH works here — run scripts, check GPU utilization with nvidia-smi, tail logs, install packages. You can open multiple terminal tabs in the same panel and switch between them.
Both panels connect over a secure proxied WebSocket, so there is no SSH key setup or port forwarding required. You click Connect, wait a moment for the machine to start, and the panels are live.
Lab Compute in the Chat View
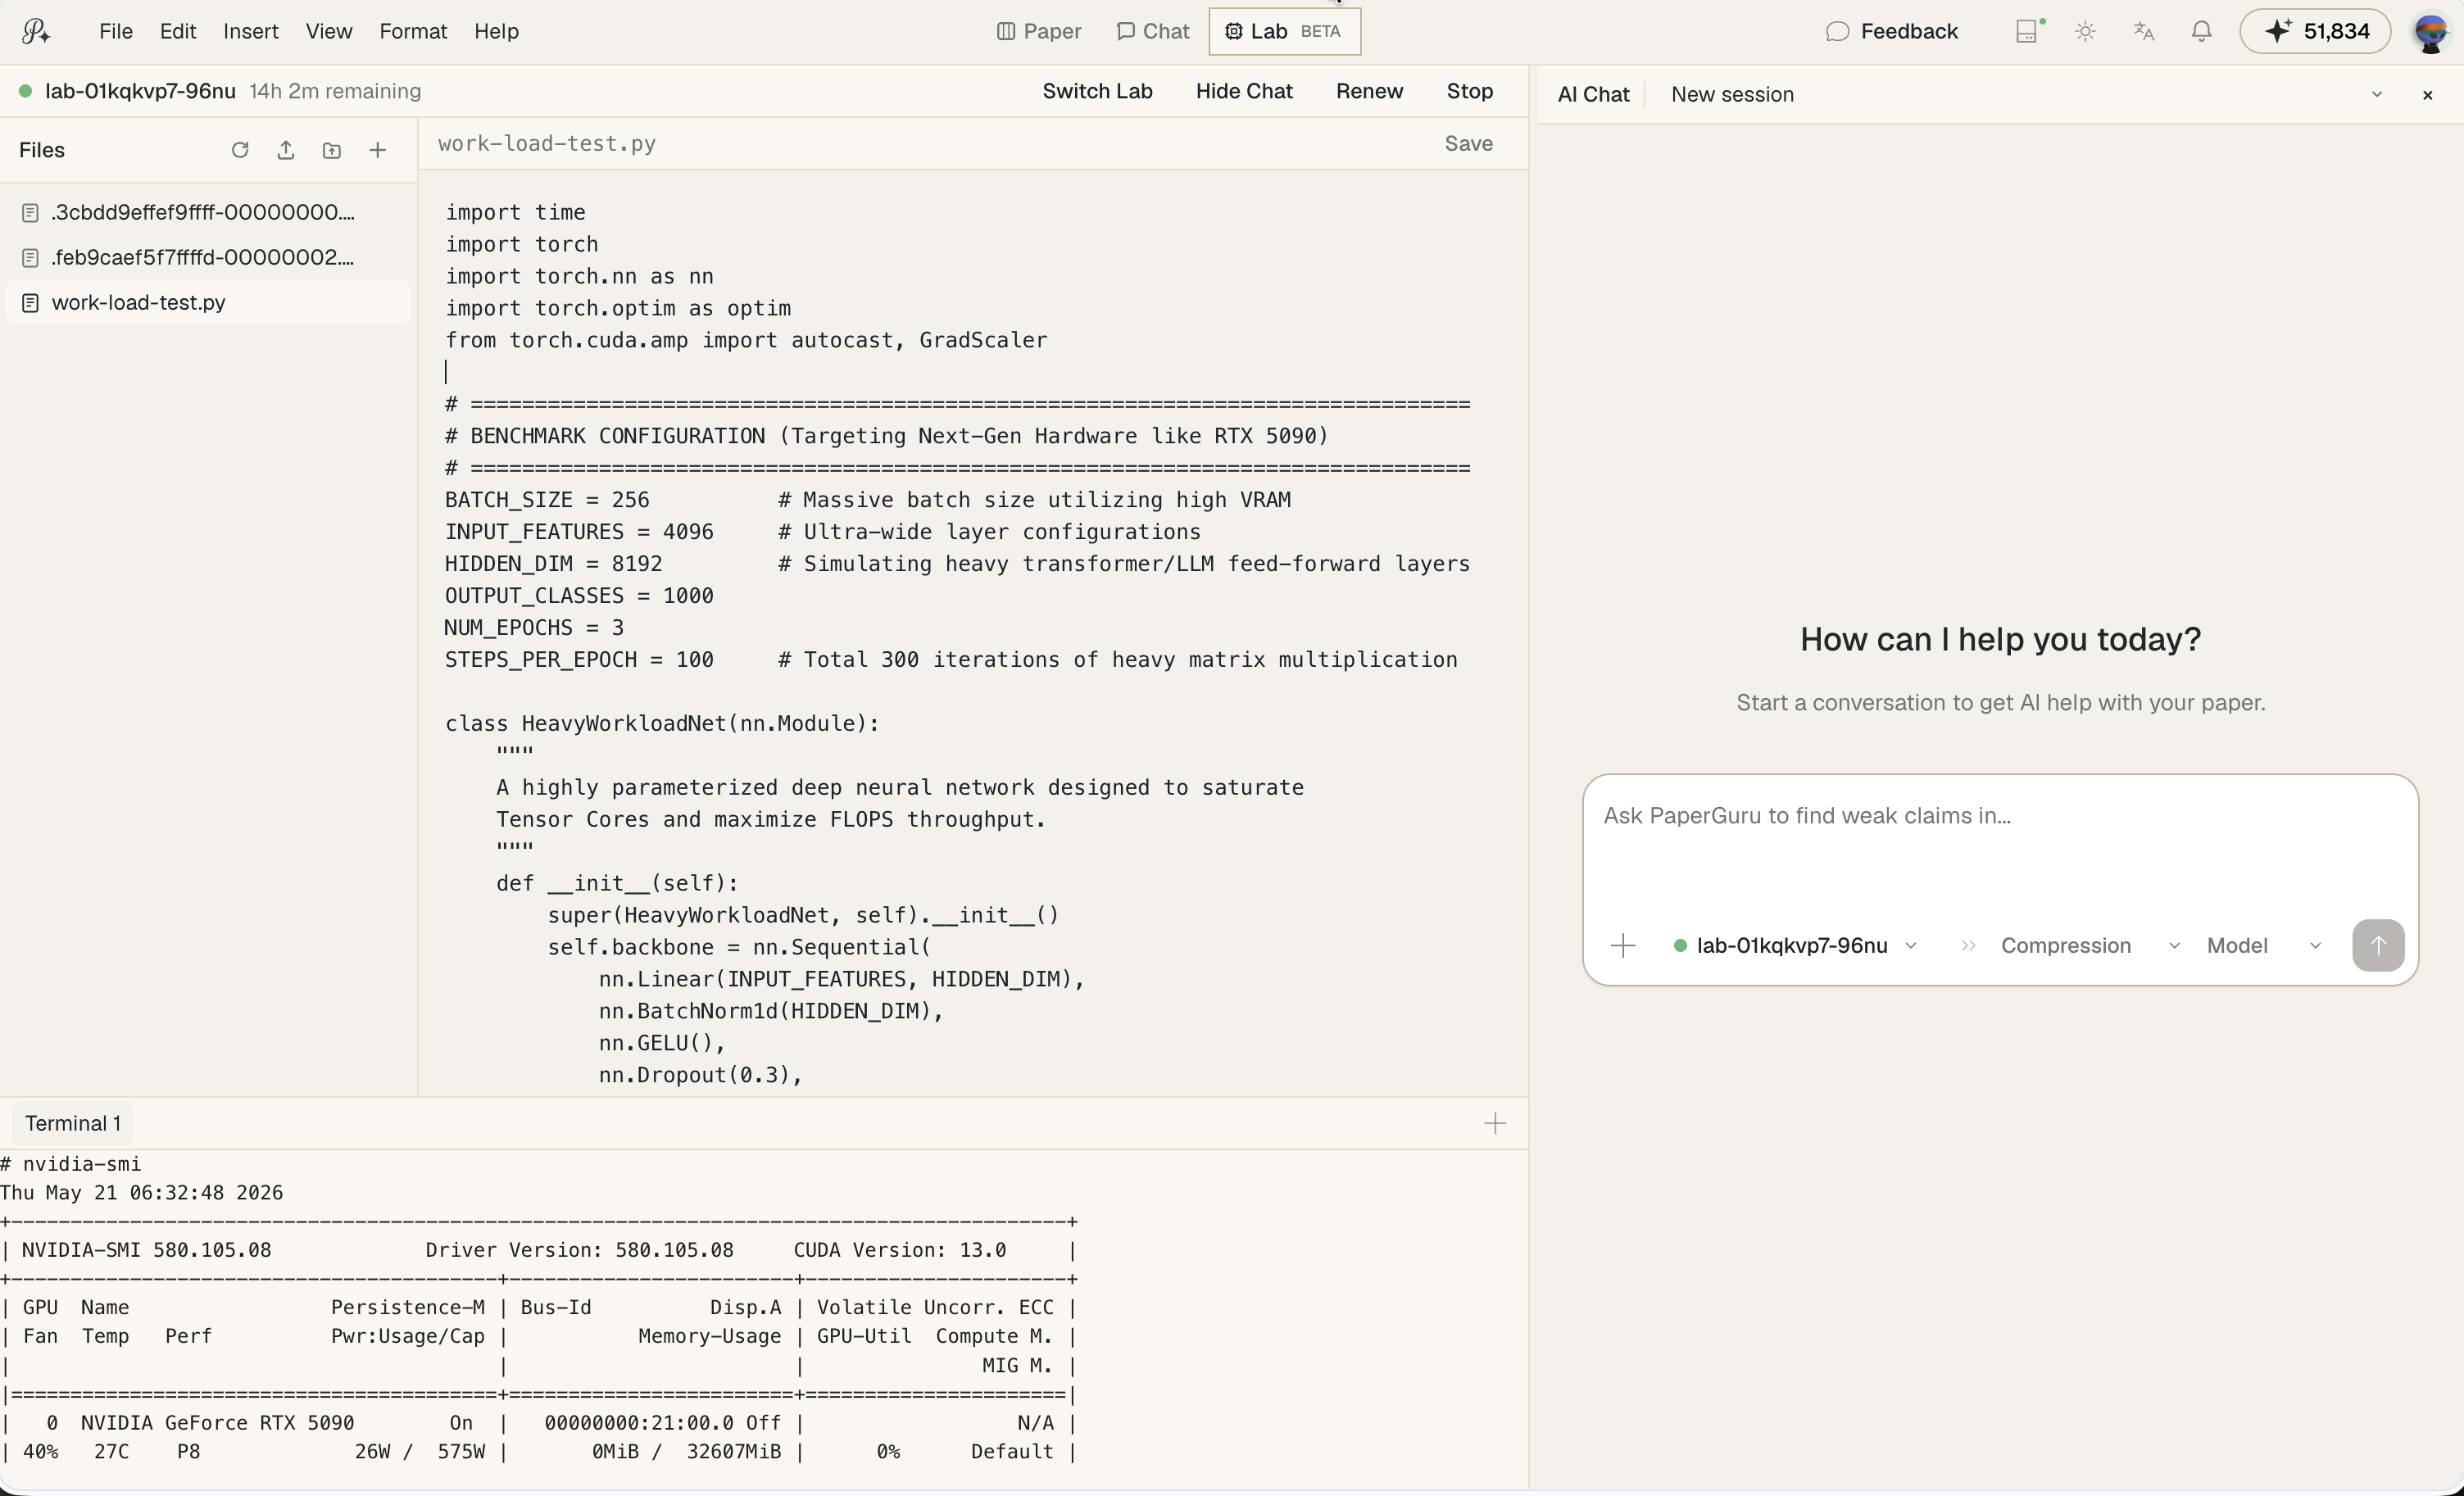
You do not have to leave your research session to use the compute. In the chat view, the Lab Compute file browser and terminal appear in the sidebar, alongside the paper you are working on. The layout is the same — file tree on one side, terminal on the other — just integrated into the panel that sits next to your editor and conversation.
This matters because the two workflows feed each other. You run an experiment in the terminal, see the output, and immediately continue drafting. The agent has context on both sides — what you asked it to write and what is happening on the machine.
Agent Commands: @lab and @exp
When a Lab Compute instance is connected, two prompt prefixes become available that route the agent directly into your remote environment.
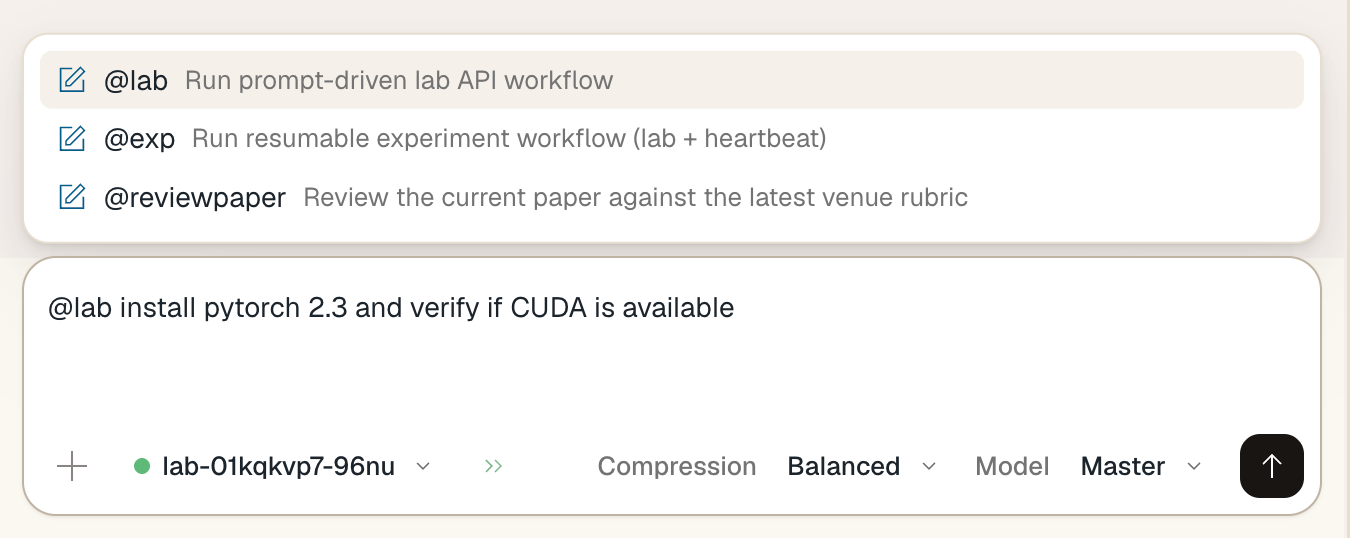
@lab is the direct command mode. Type @lab followed by your goal, and the agent executes it on the connected machine using a dedicated remote execution tool. It can run scripts, inspect files, check GPU status, install packages, and report back — all within the same conversation thread.
@lab run the training script in /workspace/train.py and report validation accuracy
@lab check what's in /results and summarize the loss curves
@lab install torch 2.3 and verify CUDA is available
@exp is the resumable experiment mode. Where @lab handles single-shot tasks, @exp is designed for long-running, multi-phase experiments that may span hours and need to survive interruptions. When you send an @exp request, the agent follows a structured protocol: it writes a human-readable heartbeat log and a machine-readable state file to the remote machine, runs each phase with restart-safe patterns (tmux, nohup), and records progress checkpoints along the way. If a session is interrupted for any reason — network drop, timeout, or a manual pause — you can resume exactly where it left off. The agent picks up the last stable checkpoint from the state file and continues without re-running completed phases.
@exp train the model in /workspace/train.py for 50 epochs and log eval metrics
@exp run the full ablation suite in /workspace/ablations/ and summarize results
@exp --resume continue the training run from the last checkpoint
Use @lab for quick, targeted operations. Use @exp when the work is substantial enough that you would not want to start over if something interrupts it.
Both modes are only active when a Lab Compute instance is connected. If you use either prefix without a live connection, the agent will let you know.
Renting Without Surprises
Lab Compute is a prepaid model by design. You buy hours in advance, and the system tracks consumed time against your balance. When your purchased time is nearly exhausted, you can renew directly from the toolbar without stopping the machine. If a session is left running and the balance runs out, the machine stops automatically — you are never charged beyond what you purchased.
The connection and stop states are visible at a glance in the Lab Compute control in the toolbar. Green means connected and running. You can pause, stop, or reconnect at any time, and the machine persists its state across stop-start cycles within the same purchased block.
Closing the Loop
The goal of Lab Compute is to make the distance between running an experiment and writing about it effectively zero. The same session where you ask PaperGuru to search literature, draft a methodology section, and format your bibliography is the same session where your code is running on a real GPU — and where the agent can read the results and incorporate them directly.
We built this because that gap — between the compute environment and the writing environment — is where significant friction lives for empirical researchers. Closing it is not a workflow improvement. It is a different kind of research experience.
Lab Compute is available now. You can add a machine from the Lab tab in your workspace or directly from the compute control in the chat toolbar. Start with Compute XS for most workloads, upgrade to Compute S when you need it.
As a beta, there is still active work happening across the board. We are continuing to improve connection reliability and startup times, refine how the agent integrates with the remote environment, and streamline the overall experience of moving between writing and computation. Expect the feature to evolve quickly based on how people actually use it.
If you have feedback on the experience — setup time, the terminal behavior, how the agent handles @lab or @exp requests — we want to hear it. Use the feedback button in the top-right of the app's title bar to send it directly to us.